Email setting for iPhone and iPod
25.1.2012 Email setting for iPhone and iPod
You can receive and send your mail from your iOS device and the setting is very easy. Follow the next few steps:
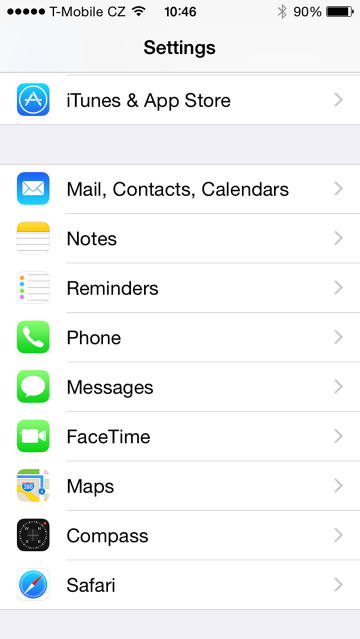
Settings
Needless to say, but we will be operating under the system
settings.
On iOS devices, you can enter system settings by clicking this
icon.
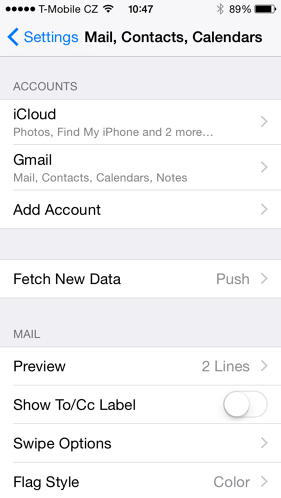
Mail, contacts, calendars
Enter the Mail, contacts, calendars settings.
Add new account
Under Accounts, select "Add account" option.
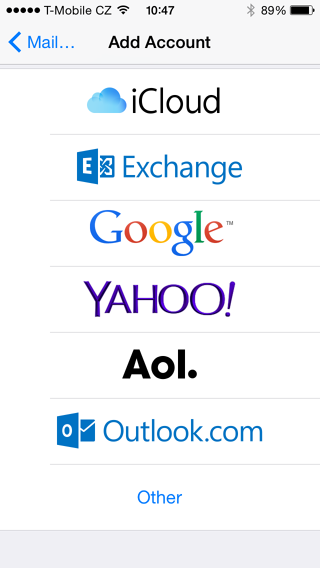
Other
Select "Other" as account type (usualy the last option in the list).
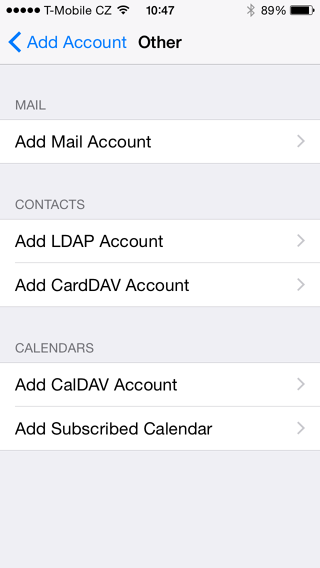
Mail -> add account
Select "Add account" under the Mail section.
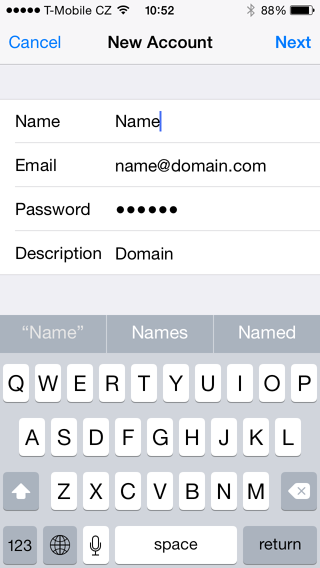
Enter your information
Name: Enter your full civil name here. This will be displayed as "sender" when receiving your emails.
Address: Your full email address including the domain name
Password: This was assigned to you on creation of the email account. If you don't know your password, contact our .
Description: Your own name of the account to distinguish each other when having multiple accounts (enter anything you want, ex. Infonia).
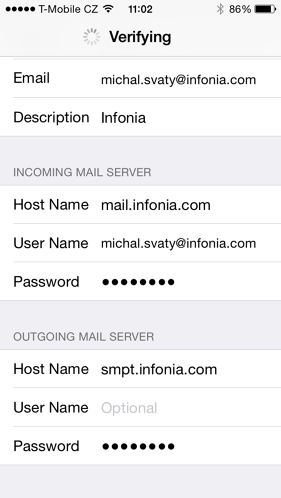
Incoming server settings
Now, scroll down to "Incoming mail settings".
Host: mail.infonia.com
User: your full email address
Password: Your password
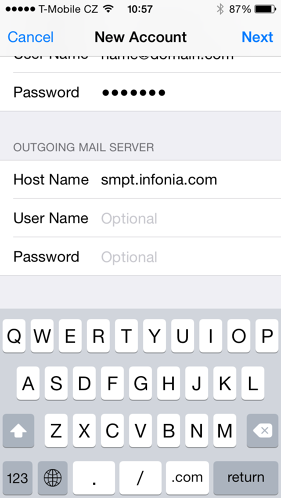
Outgoing server settings
Here, use the information you received from your interent service provider. We recommend using your ISP's SMTP server.
However, if your ISP does not provide any SMTP server, you can use the same settings as for Incoming mail settings.

Confirm and proceed to the next step
You will probably see a confirmation dialogue that the identity can not be verified. You don't have to worry about that, just confirm it by clicking Continue.
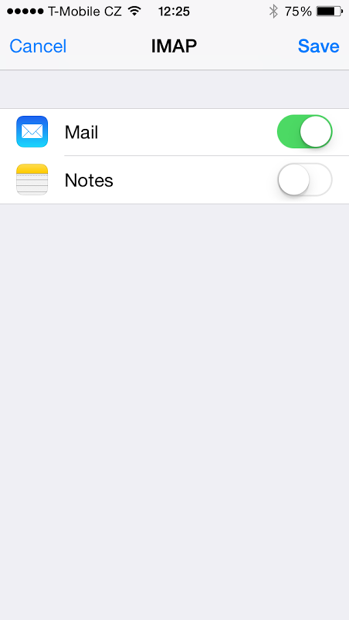
Last step
At the end, just select that you only want to synchronize mail, not notes.
If you go to the mailbox now, you should be able to recieve and send emails from your address.

Support
- 25.1.2012 Email setting for iPhone and iPod
- Email Settings